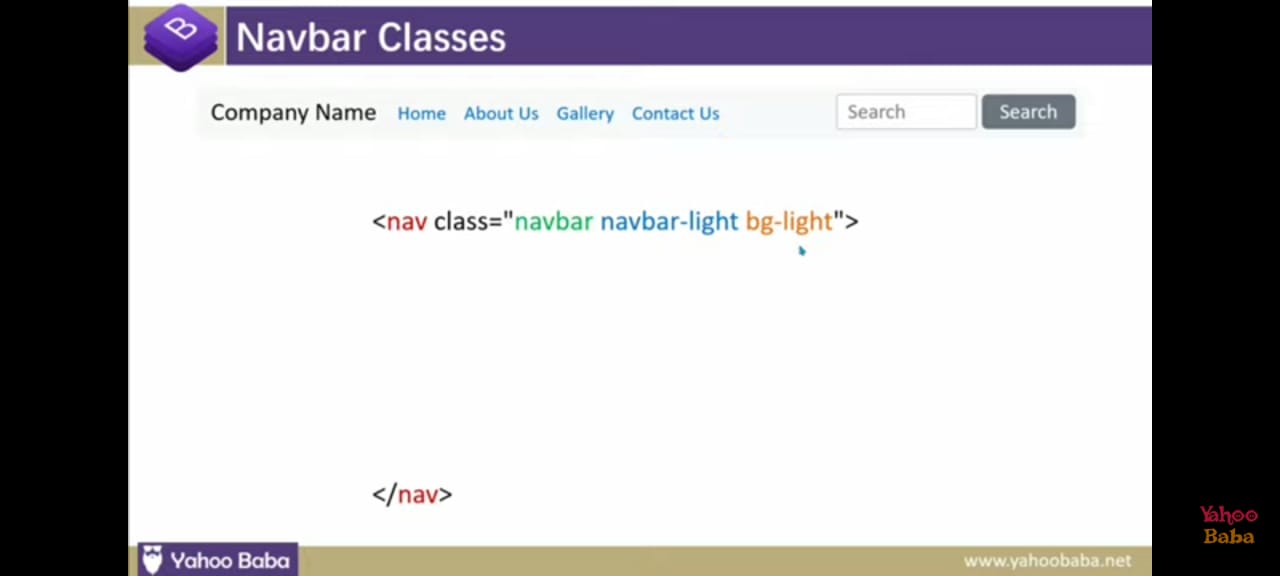
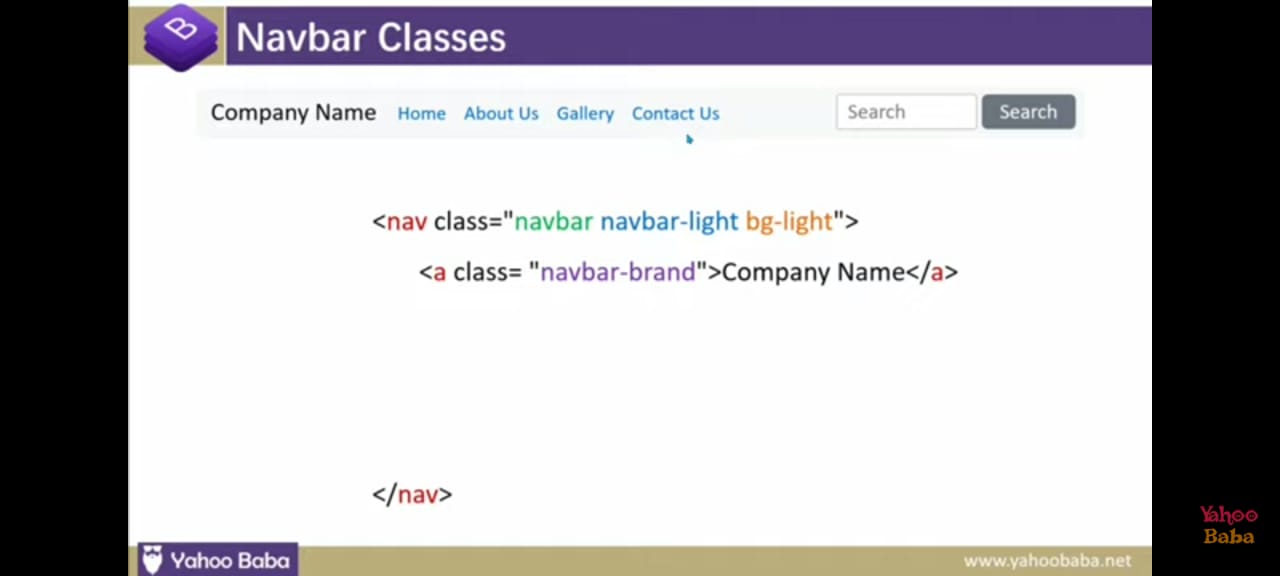
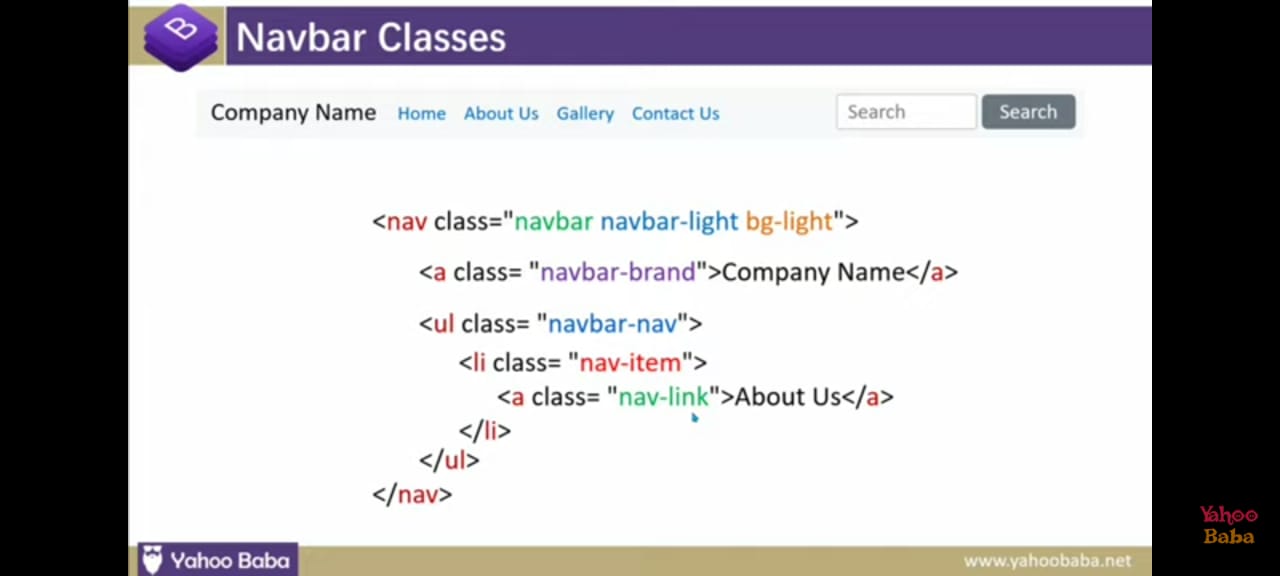
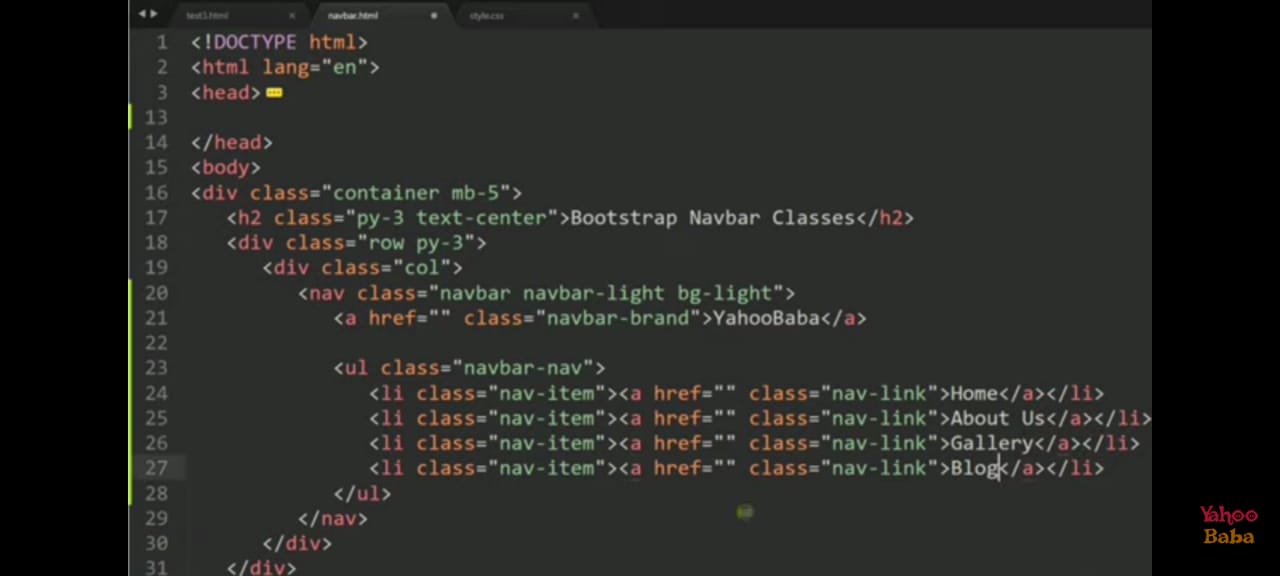
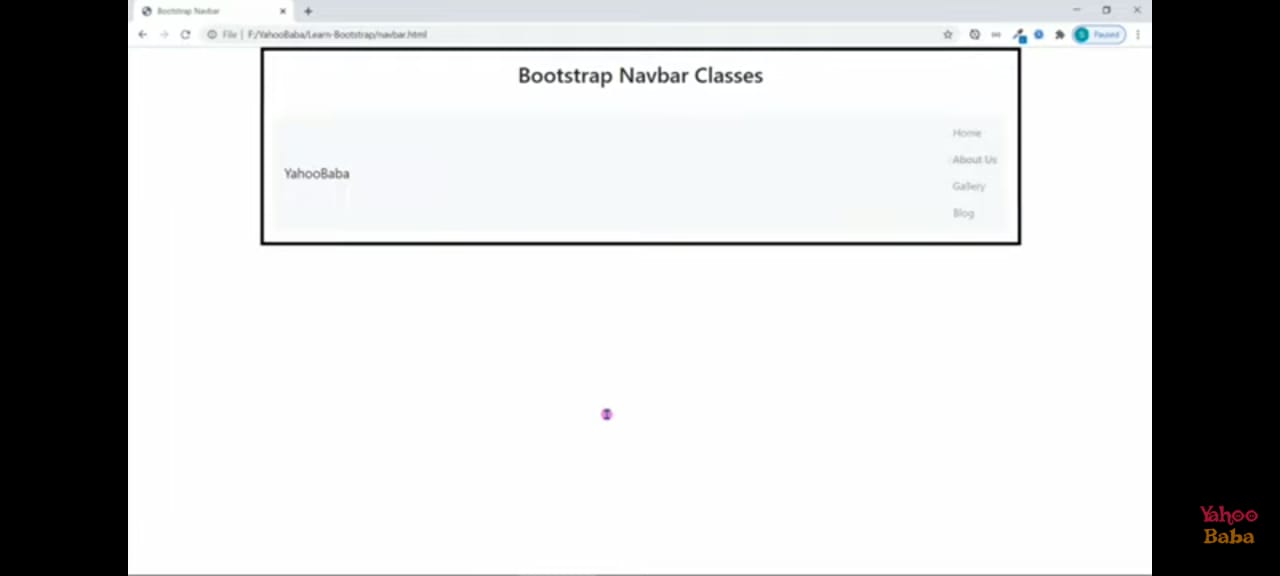
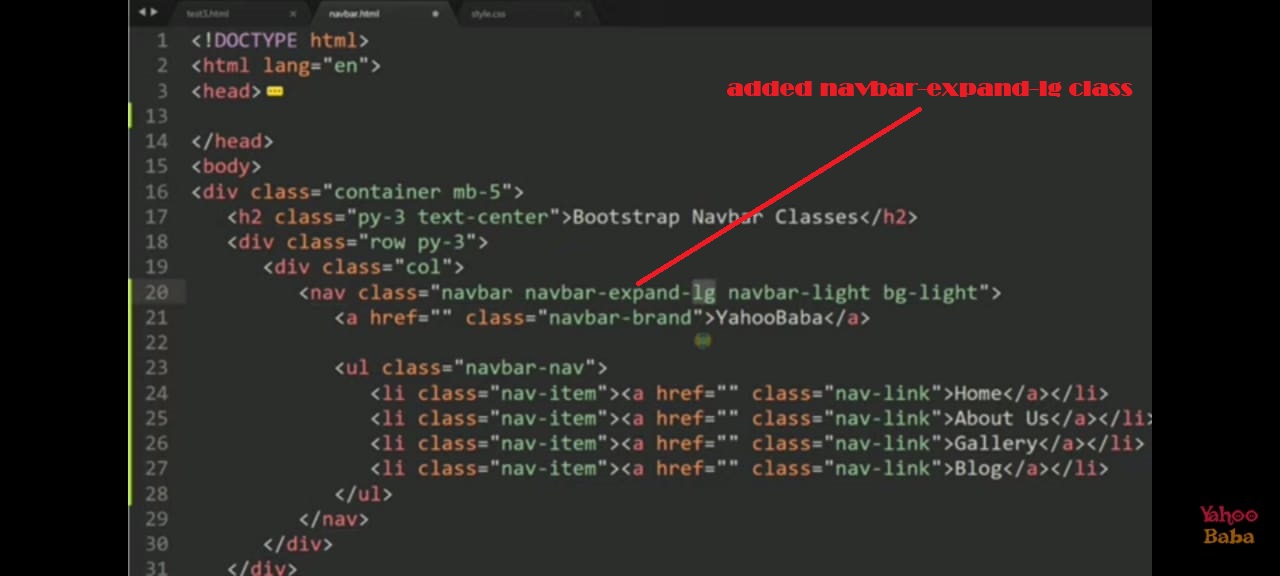
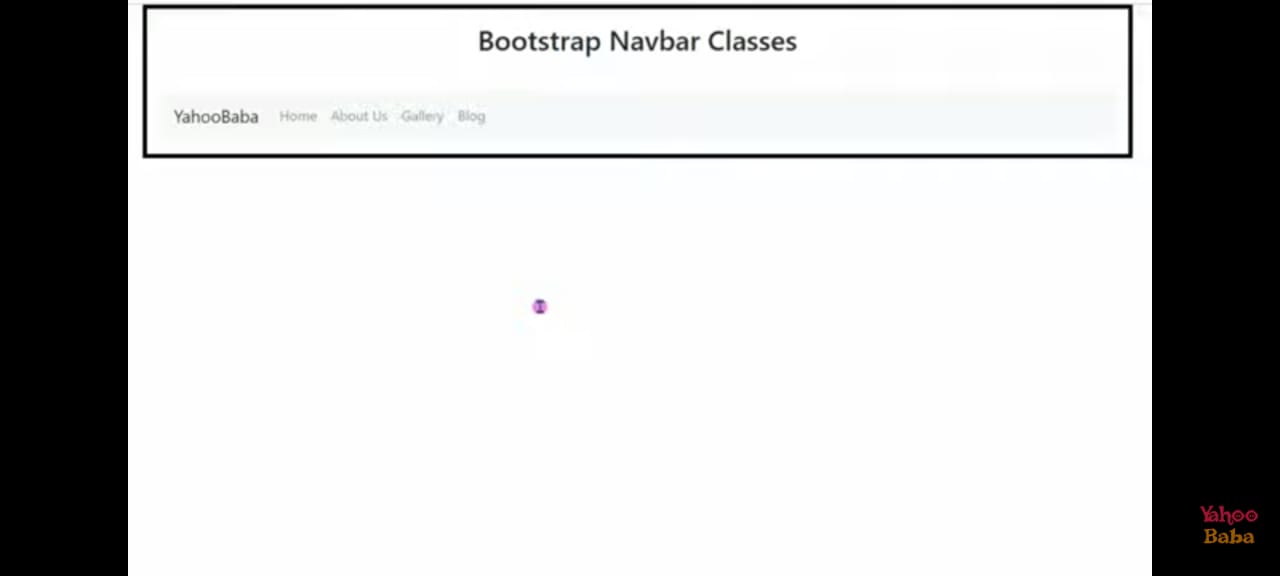
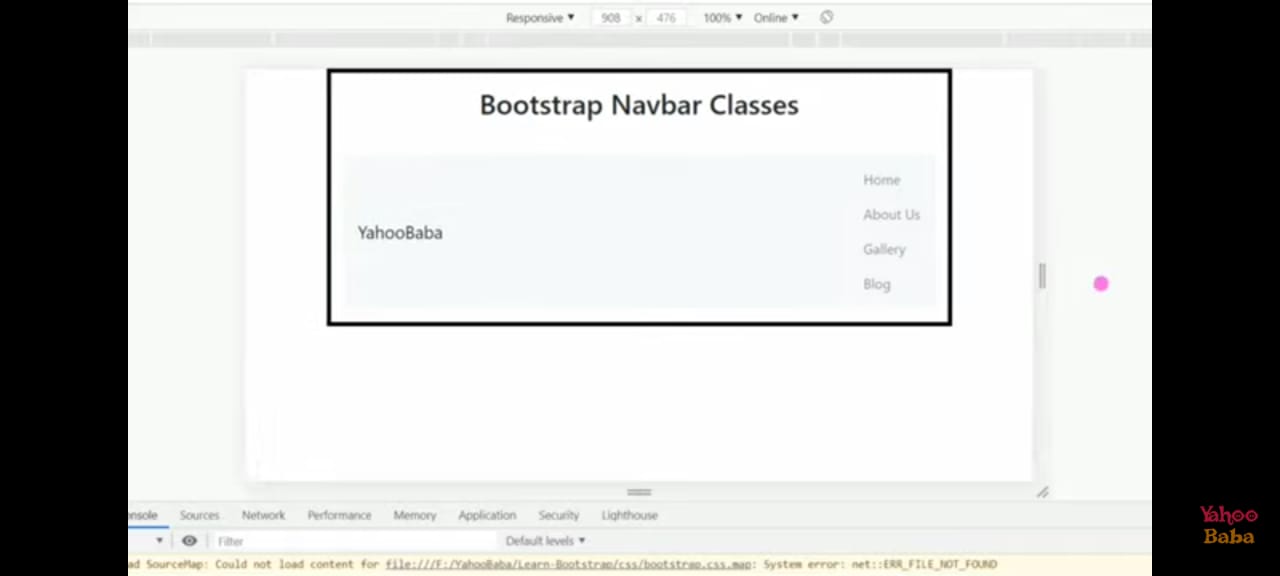
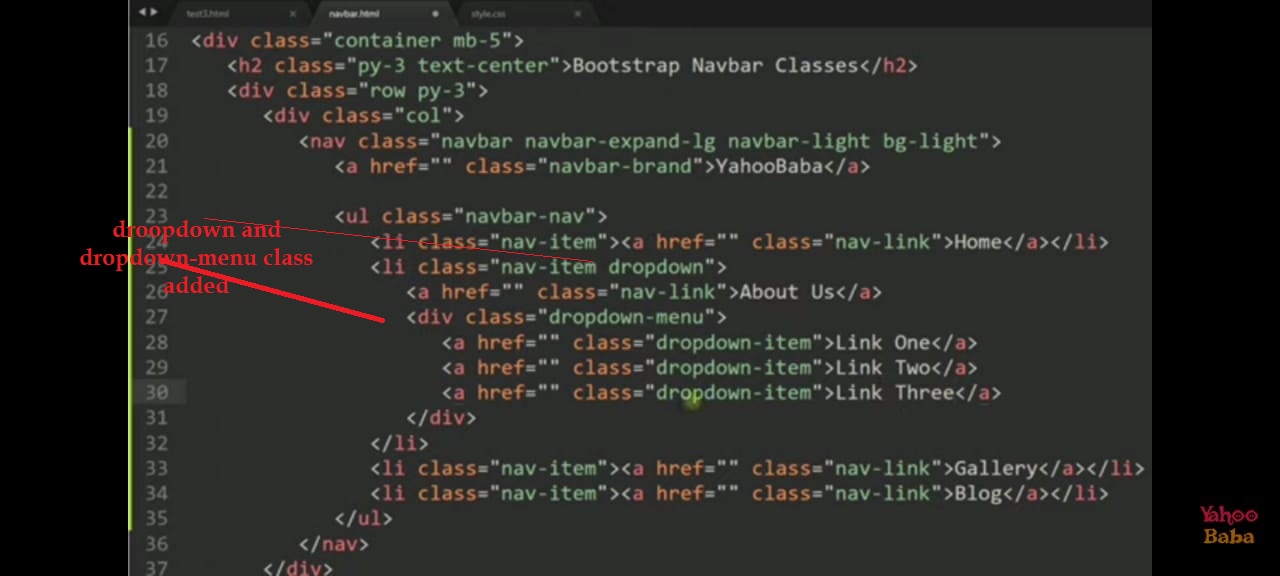
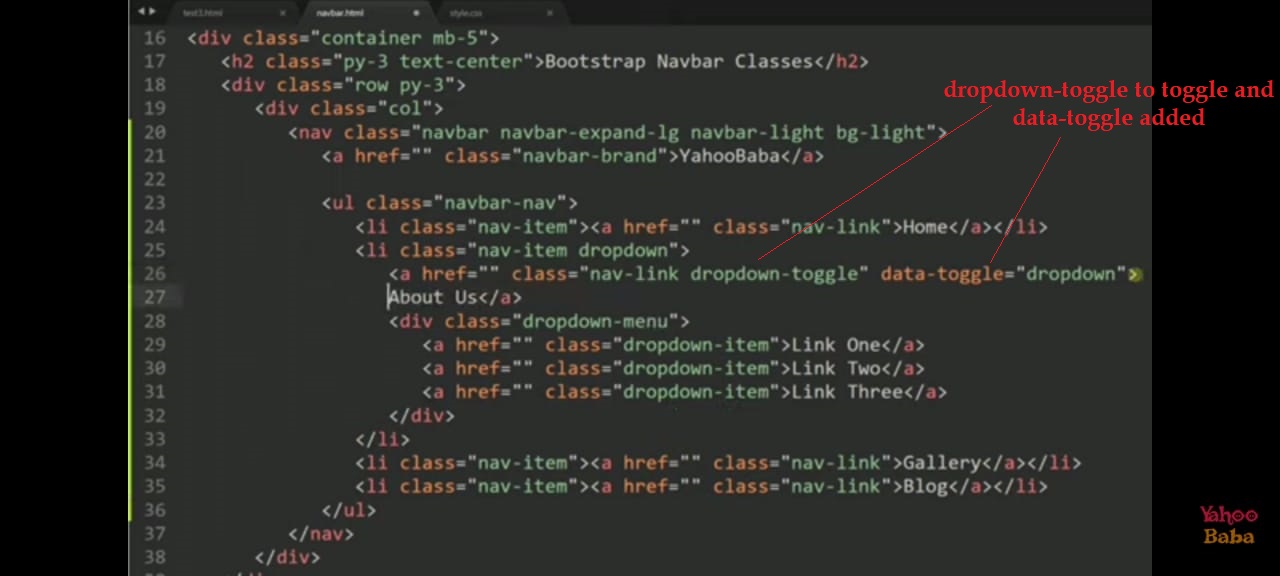
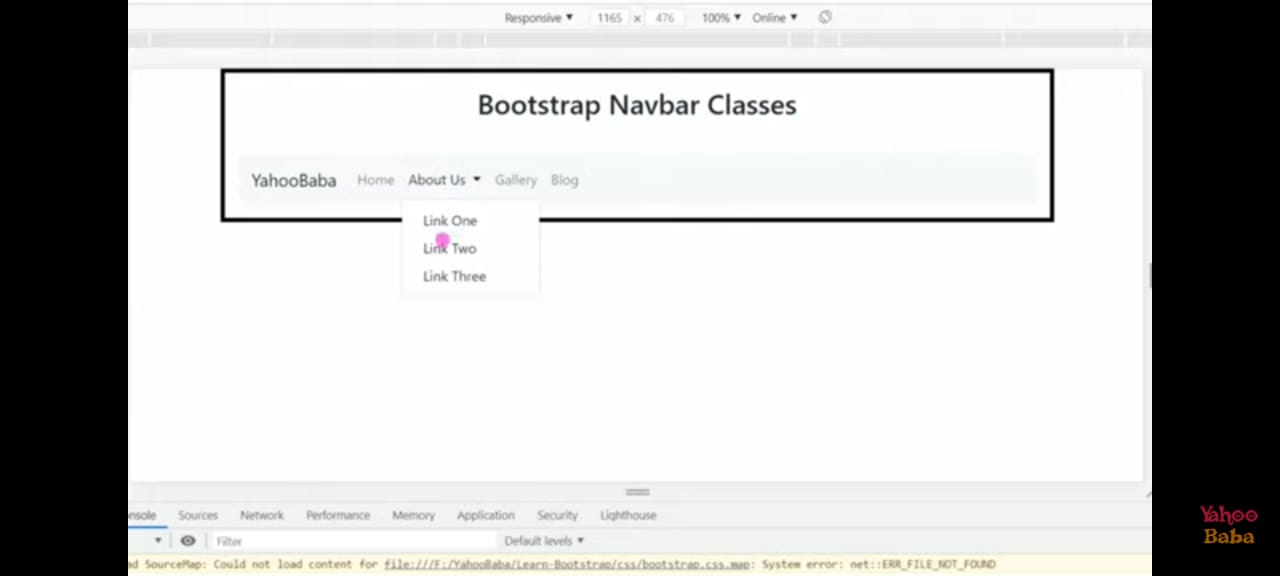
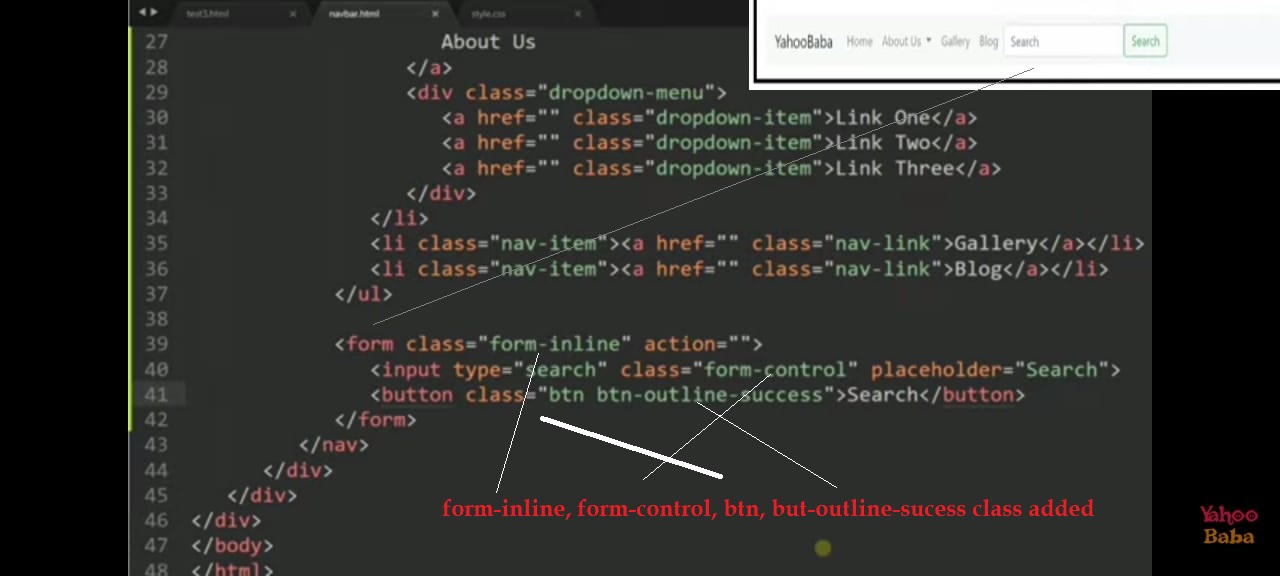
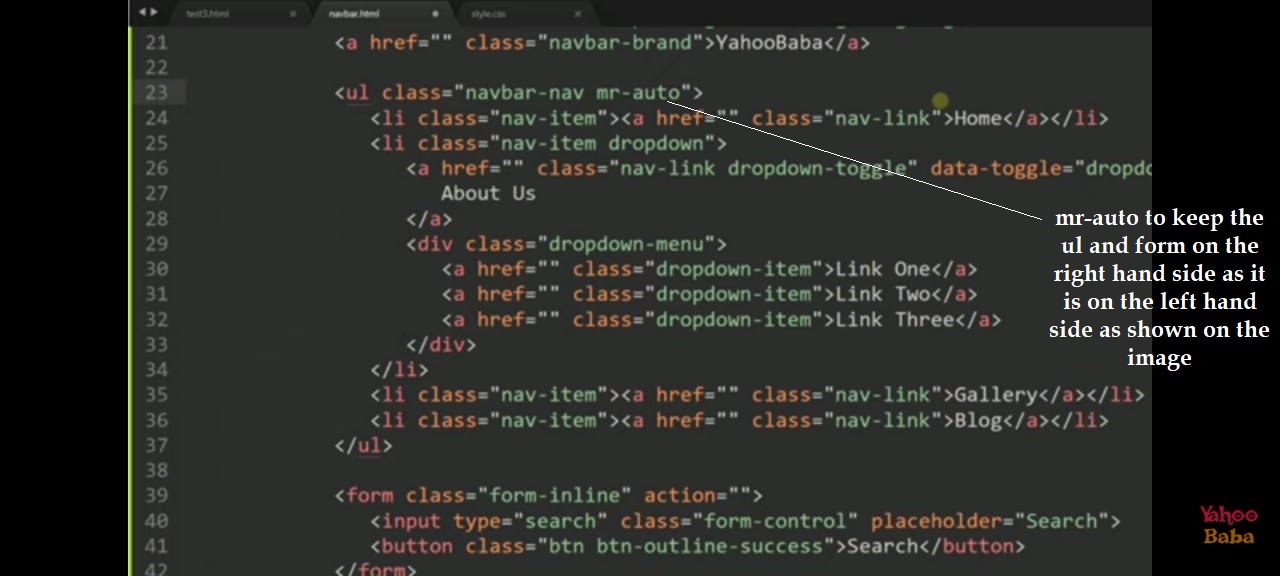
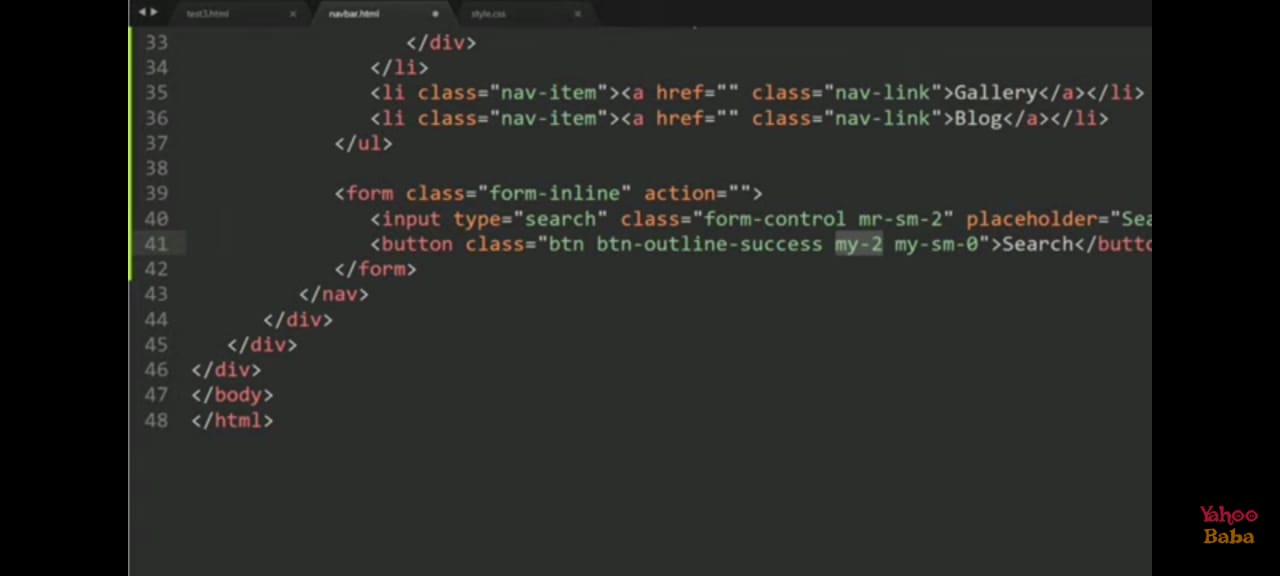
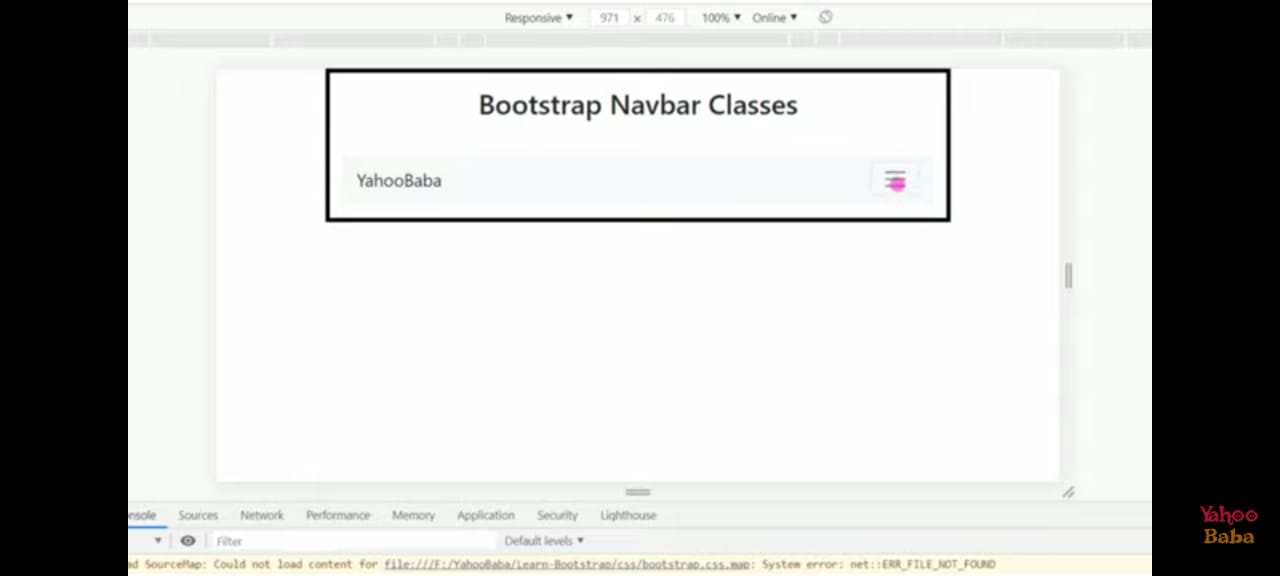
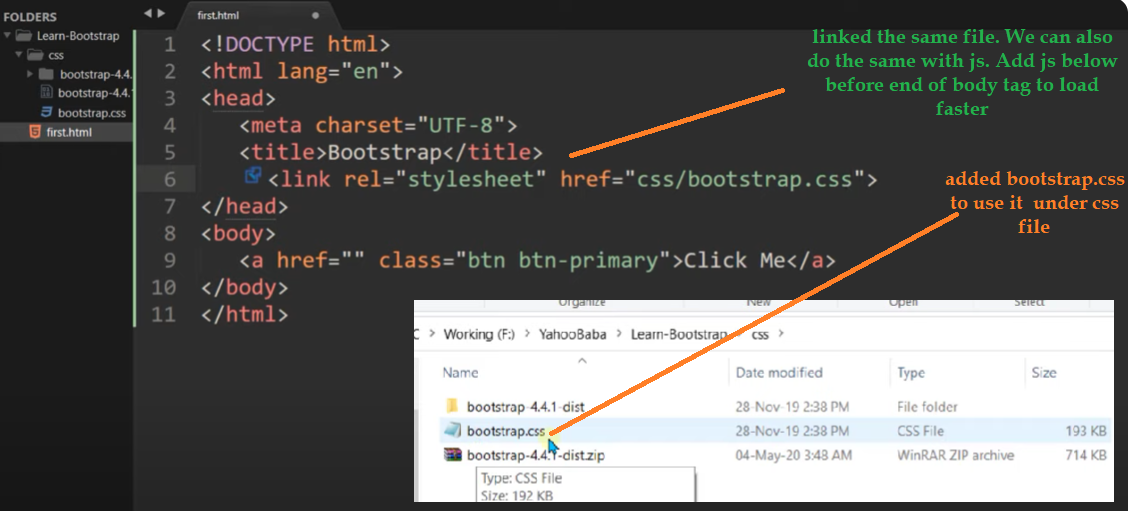
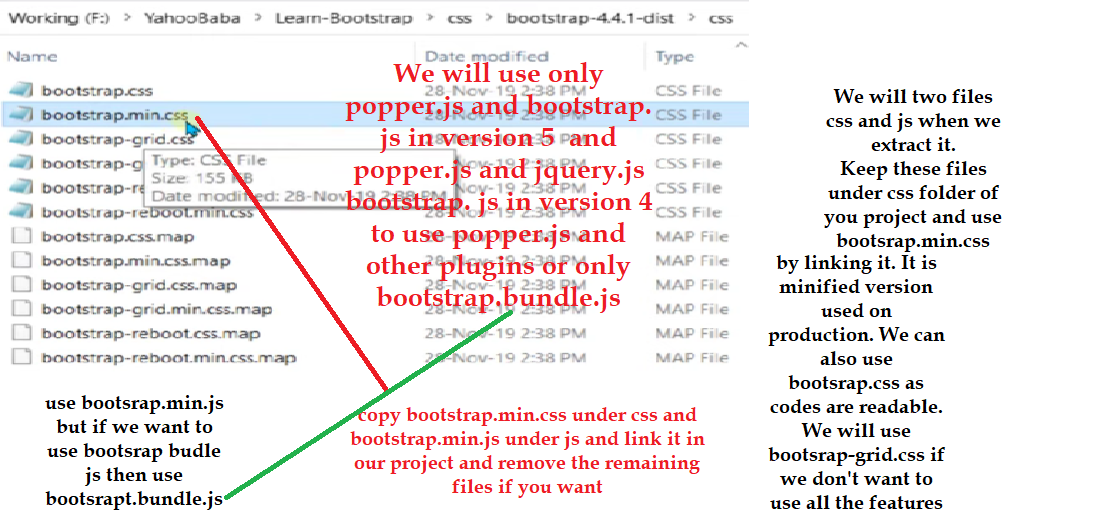
How to use navbar

collapse/data-target/data-toggle="collapse"
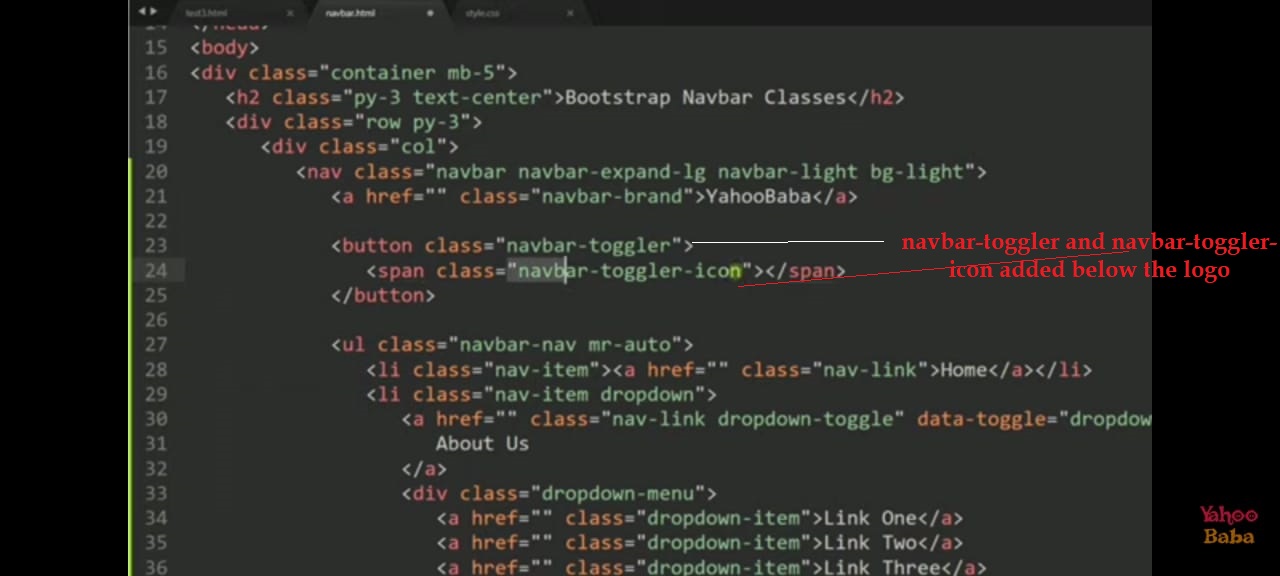
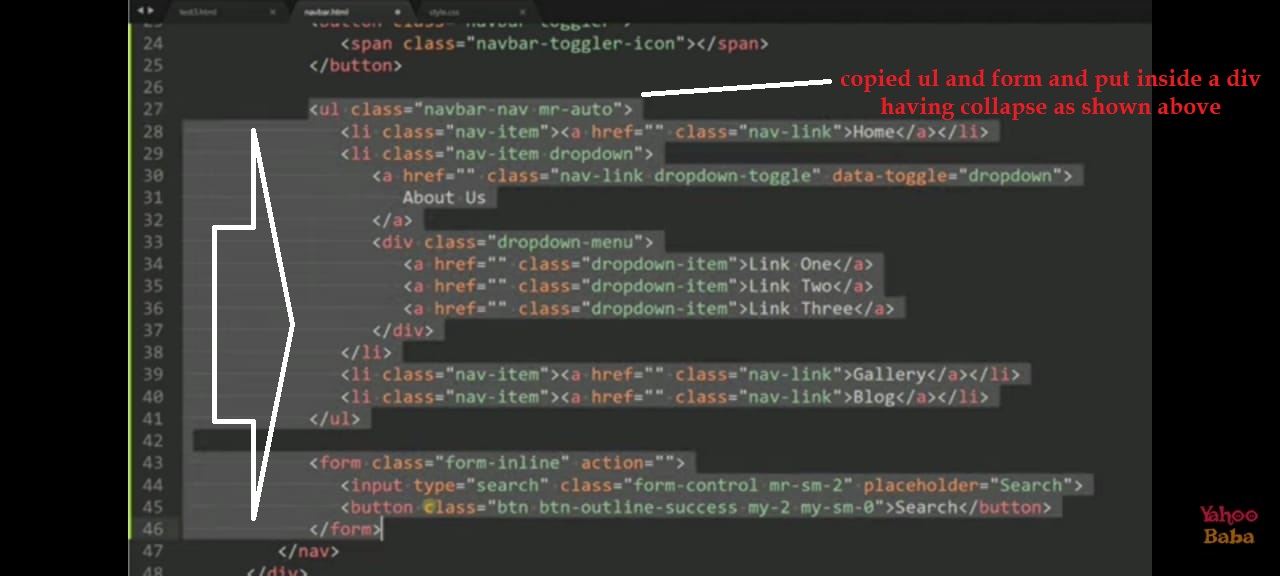
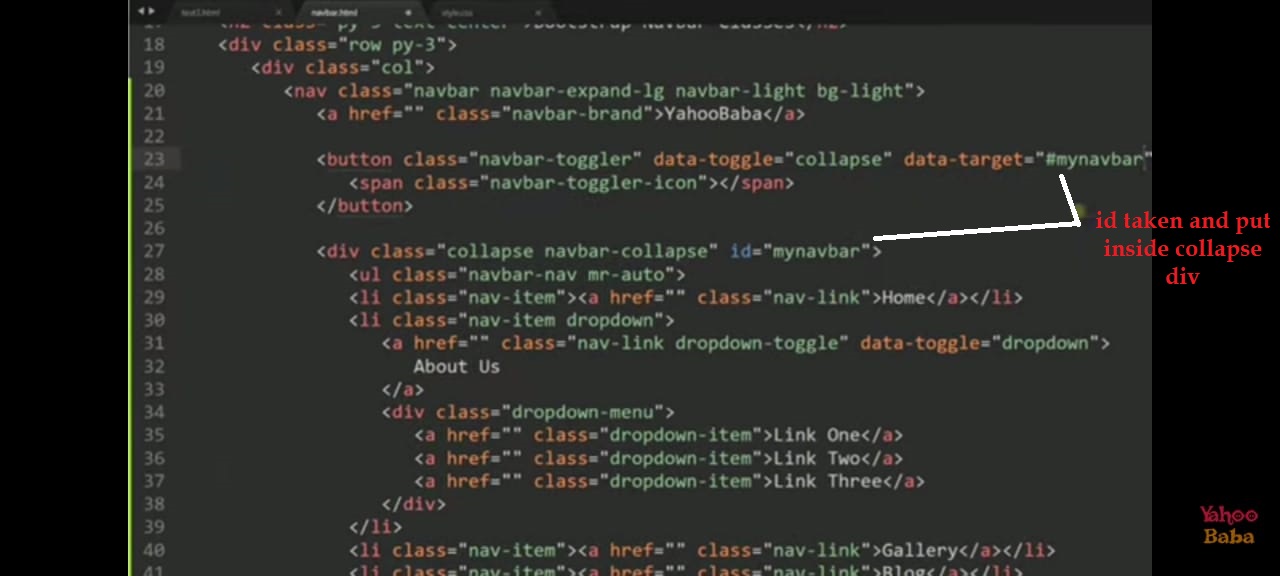
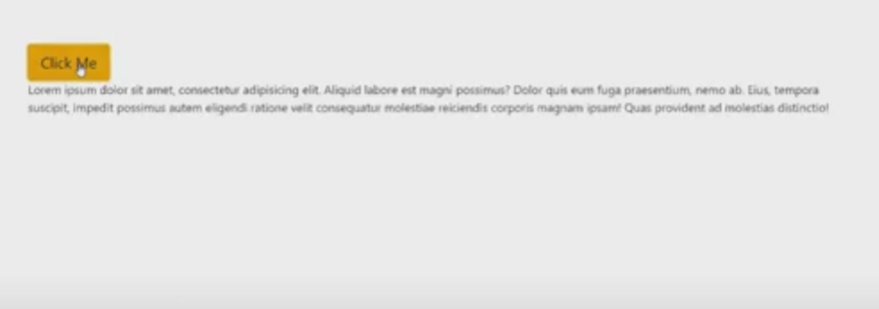
Whenever we want to toggle(hide/show any content) on click of any anchor tag or button we have to use an attribute data-toggle="collapse"
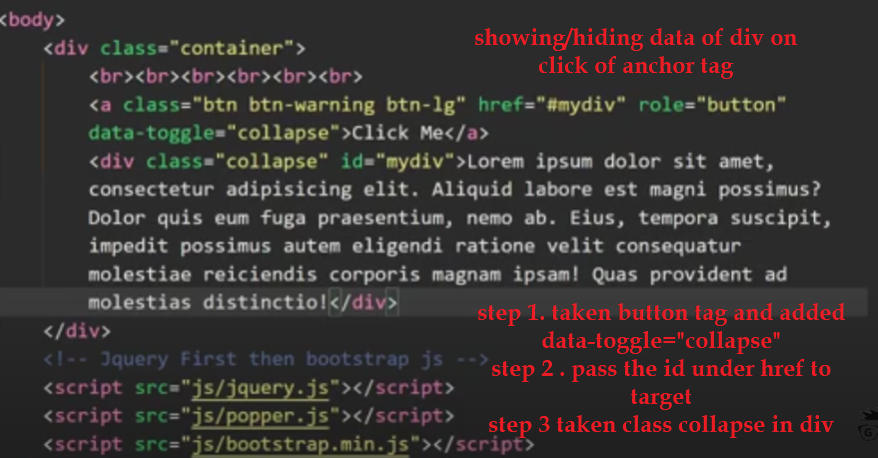
When we use any anchor tag, we pass the content inside the href attribute. Such as if we have to show a div on click of anchor tag, First we will take class collapse on diva and then we will pass id="anyName" on the div and then paste #anyName such as href="#anyName" under href value but in the case of button we use use another attribute data-target="#anyName" because we can't use href in button
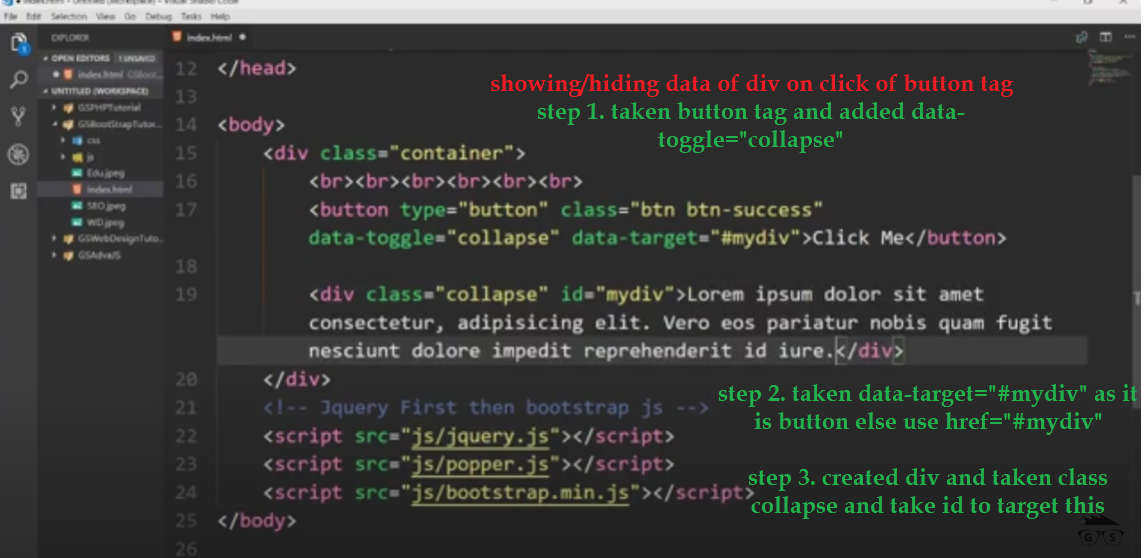
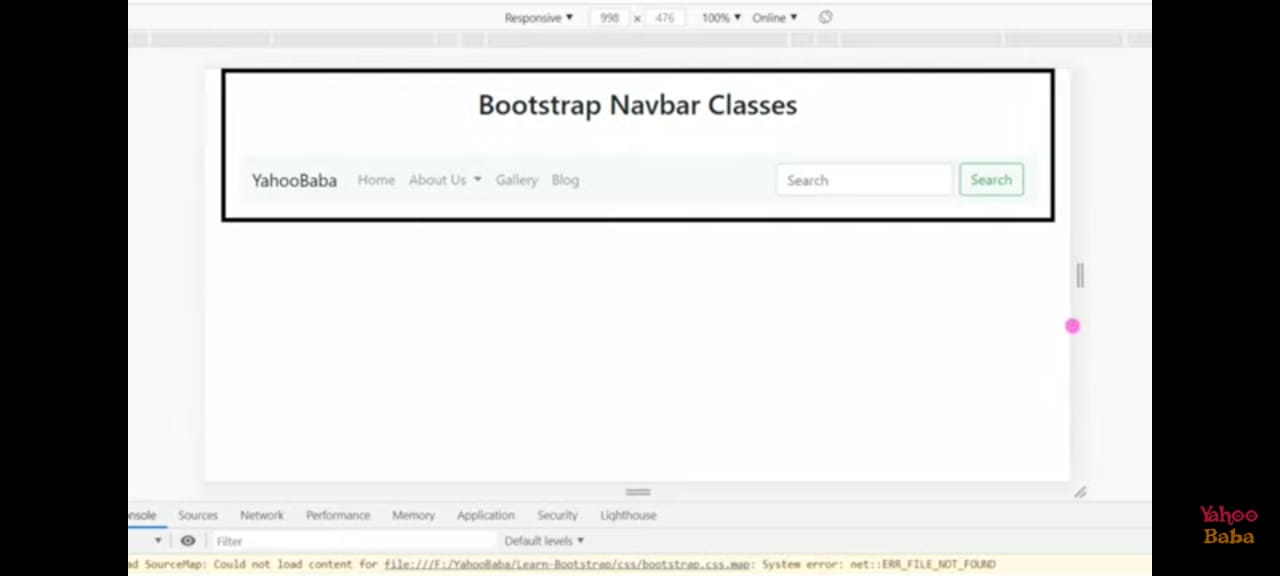
The div content will show when we click on the button and when we re-click it will hide.
class=”container” will give margin from left and right and at mobile screen it will 100% width Please note:- Note:- In container class (max-width) will change on different screen size. We know that we have 6 breakpoints:-
In class=”container-fluid” width will give 100% in all different screen size Note:- In .container (max-width) will change on different screen size.

For notes refer to this link
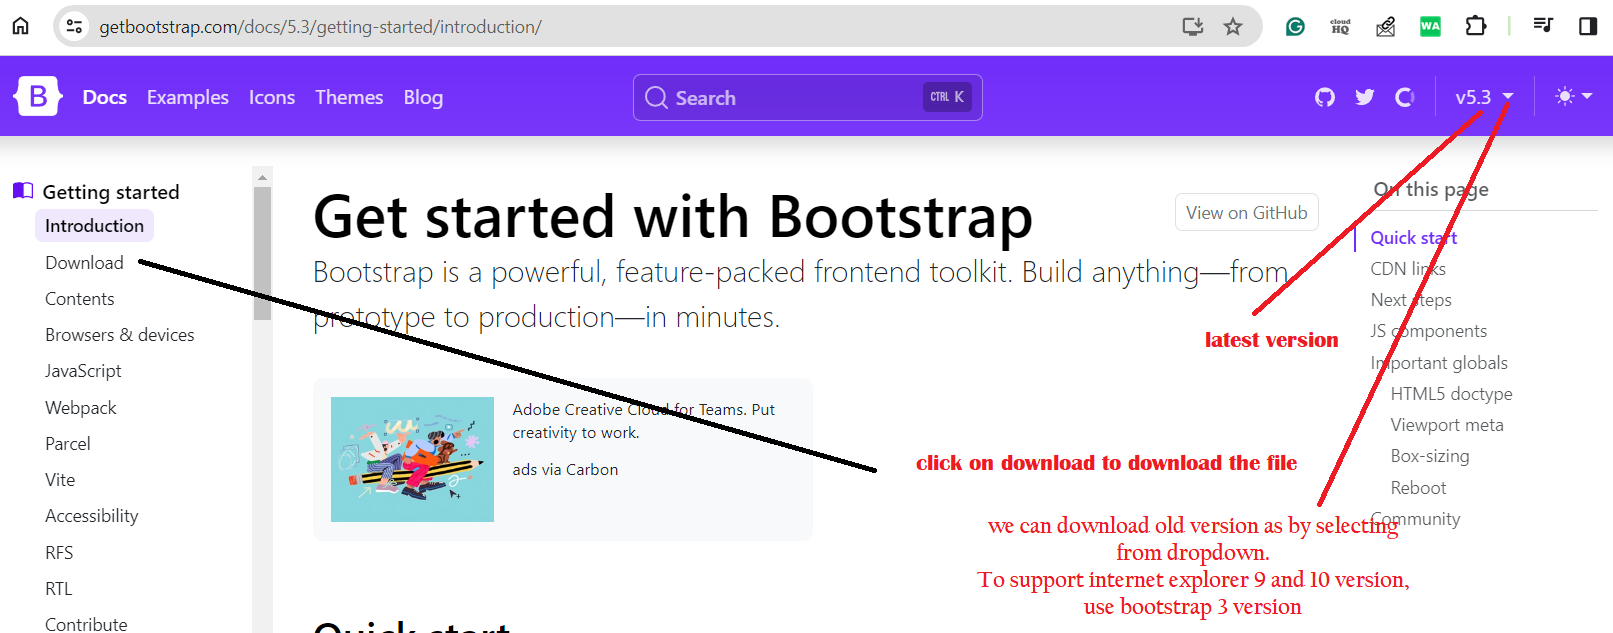
Introduction · Bootstrap v5.0 (getbootstrap.com) Or go the getbootstrap.com and then docs,
We have different things.
It is a font end framework in which html , css and javaScript used to create framework to
the work easier of the developer so that we will not have repeat the same thing. It provides
gri system, different classes and components for different work like to make the image
responsive we class="img-fluid" . It is used to make the website responsive. We do have
other frameworks but it is very famous.
Componets like button to create button.
We have different componts like buttons, alerts, pagination, navbar, carousel, nav, tabs,
accordion, scrollspy and form etc.
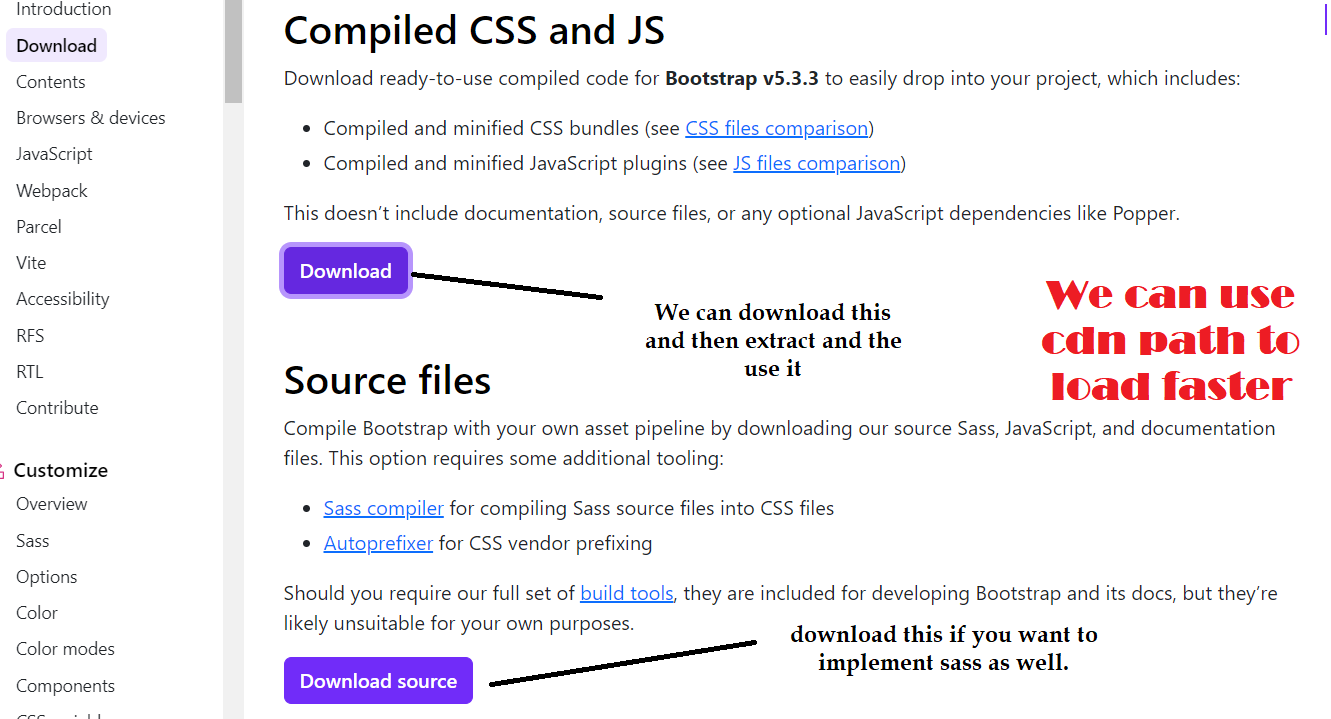
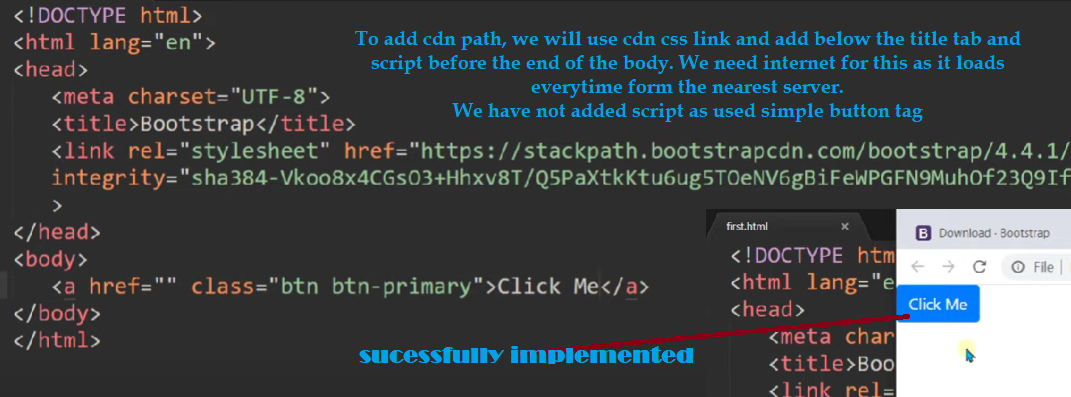
To use the bootstrape, we have copied the syntax and pasted in bootstrap folder, We need to
go the get started.com , docs, intoroduction to the syntax
How to use it

Typography is used to style the text.
Ager h1 se h6 ka size use karna chahte hai to h1 to h6 class use kar sakte hai

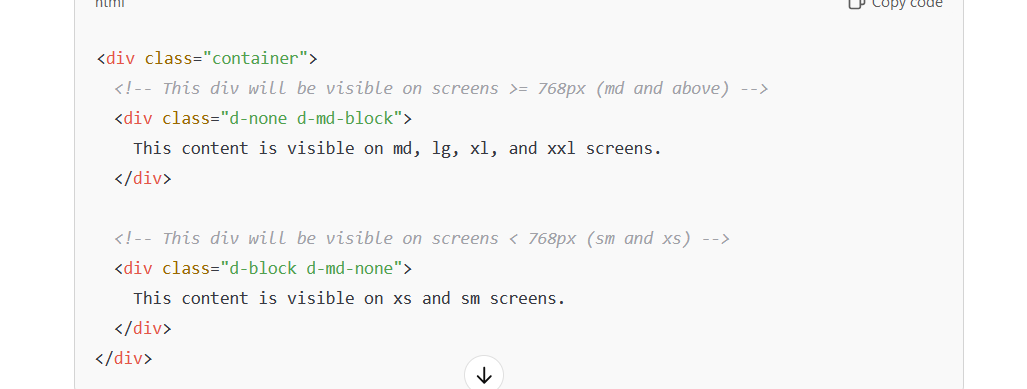
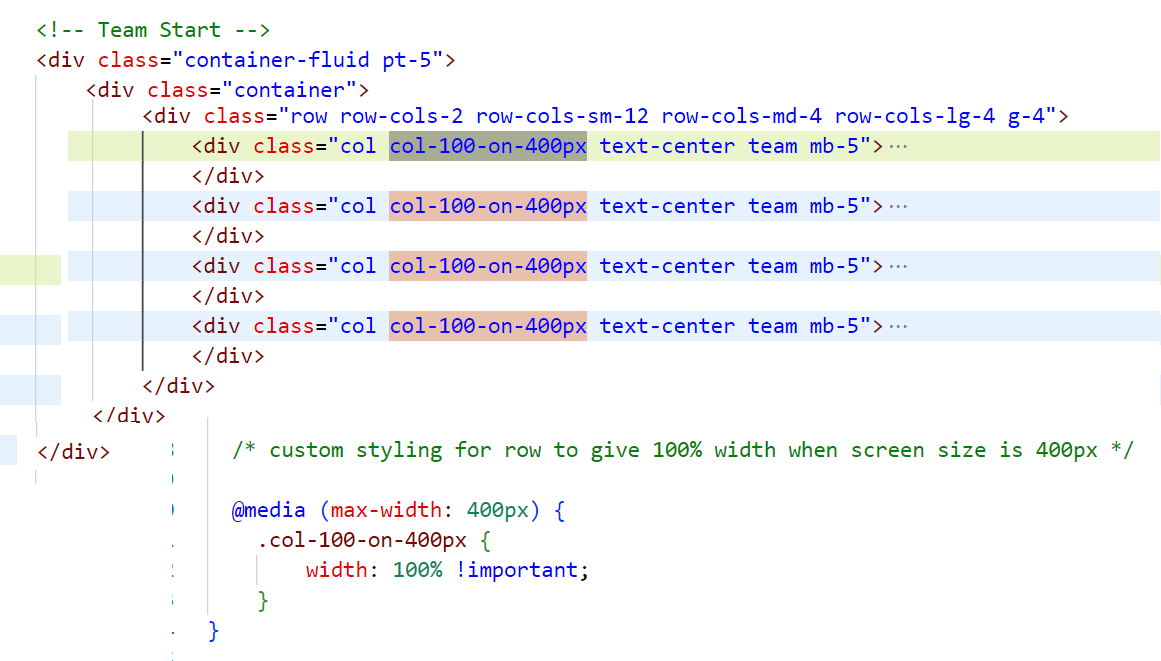
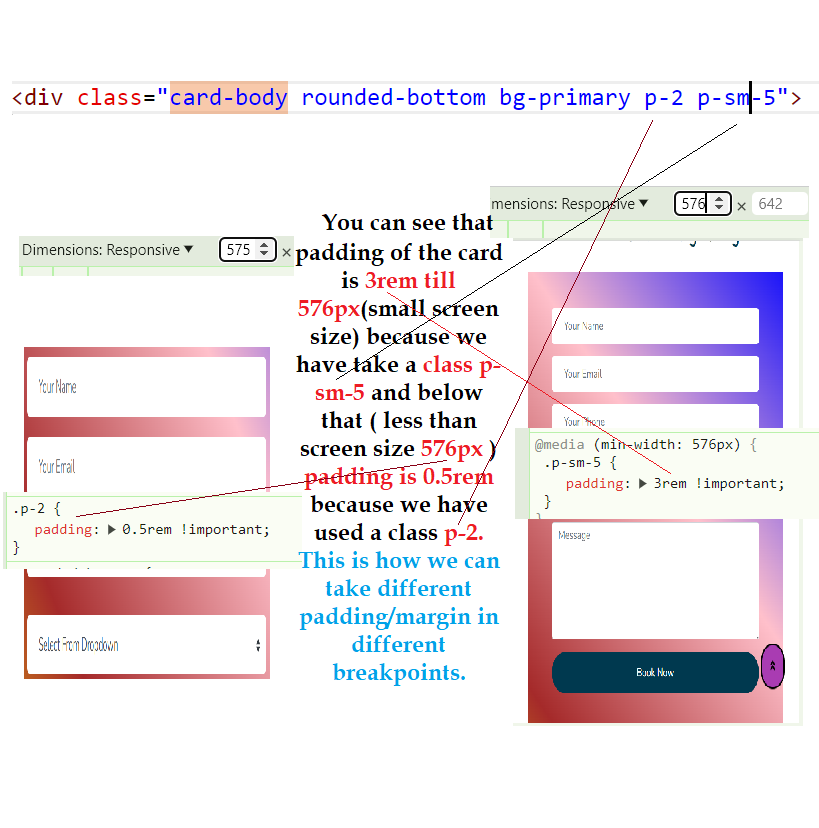
Different Margin/Padding in Different Screen Size
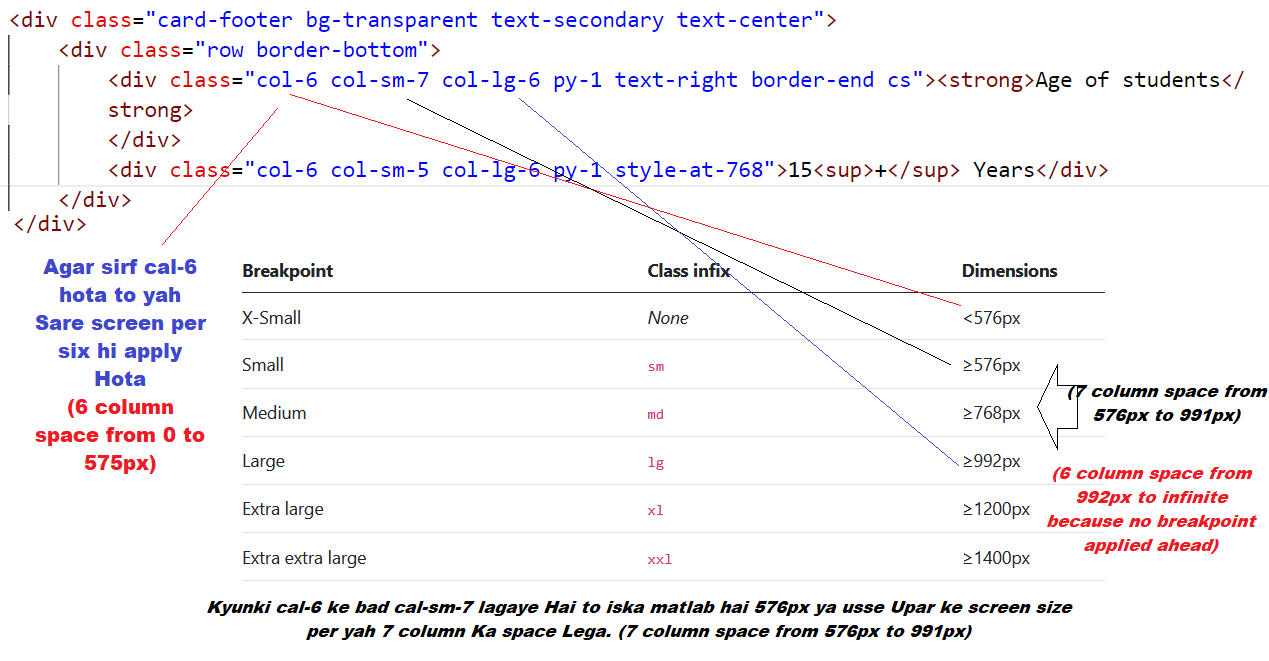
6 column space from 0 to 575px,7 column space from 576px to 991px and again same 6 column space from 992px to above
We should use "ls" to see all the files inside the folder and
then write node s and then press tab, it will take you to the source folder
like node ".\src\" and if any file is inside it then write the first letter of that
file name like .\src\t and then press tab and it will show the test.js file \
available inside the source folder like .\src\test.js and then press enter and
it will show the output of the script of
var x = 11;
To clear the node or excessive code on Termail use "clear"
To get into the node write node and it will show a message like Welcome to Node.js v20.14.0.
Now, you can see the code of the file by doing the above process. To get out of the node use .exit and you will be out of the node and you will see like C:\Users\pione\OneDrive\Desktop\nodeTest\test>


Following are the reasons to use MySQL with WordPress: oOpen source oExtremely fast oA widely available database server oSupported by low-cost Linux hosting
At present version, there are about 11 tables in WordPress by default. You can check the number of tables in WordPress by phpMyAdmin. owp_commentmeta owp_comments owp_links owp_options owp_postmeta owp_posts owp_terms owp_term_relationships owp_term_taxonomy owp_usermeta owp_users Note: The number of tables may be changed with successive releases.
The wp_ is by default prefix of WordPress tables.
In WordPress, all objects are passed by value.
You can call a constructor for a parent class by this way: Parents:: constructor($value)
These are some situations when WordPress is not recommended: oIf the client is working on the non-CMS based project. oFor sophisticated and innovative e-commerce sites. oSites which require custom scripting solutions.
No doubt WordPress is good CMS, but Drupal and Joomla are considered better CMS than WordPress to work.
Wordpress.com is relatively more secure than wordpress.org because they limit the themes and does not allow plugin's installation. However, security depends on the hosting company of your website and also what steps they are taking to prevent the security problems.
Posts allow you to write a blog and post it on your site. They are listed in reverse chronological order on the front page of your blog..f
Pages are different from posts. They are static, and they do not change often. You can add pages containing information about you and your site.
WordPress posts are content published on a site with an exact date and time. They can be categorized systematically by category and tags. They are listed in reverse chronological order on a website. WordPress pages are static and do not frequently change such as contact us, about us, privacy policy. They don?t have a date and time published. However, the database stores their published date and time.
WordPress uses PHP codes to display posts. This PHP code is known as a loop.
You can disable the WordPress comment on the dashboard. On the panel, under the options- discussion you find "Allow people to post the comment." Uncheck this to disable comment.
You can edit WordPress comment using the dashboard. From the panel, under the Comments option, select edit to edit a comment.
Comments by visitors on a post are not published directly unless the admin provides it. It is called moderation. To change comment moderation setting, select Settings option from the dashboard and check the option "Comment must be manually approved."
If you don't want a comment from a new user on your blog, check the option "Users must be registered and logged in to comment" from Discussions under the Settings option..
Word Avatar is used for a user's profile image in online communications. Gravatar is a web-based service which allows its users to use the Avatar image.
You should follow these steps: oInstall security plugins like WP security oRe-install the latest version of WordPress oChange password and user-ids for all your users oCheck your themes and plug-ins are up to date
Categories allow a user to divide its content into different sections. Different topics publishing on a single website can be divided into different groups. It tells a reader what a post is about and they can easily find their content from a lot.
WordPress provides you an option to change category into tag and tag into a category. For this, you need to install Categories and Tags Converter from Import option under Tools section. More
With the help of tags, similar posts can be grouped. Hence, it makes more comfortable for the users to search for a particular post. Tags are similar to categories but still different.
WordPress Categories are broad-ranging. It helps a user to identify about a blog. It is possible for a post to have more than one category. A post must have at least one category. WordPress Tags are like categories, but they are used to describe a post more specifically. Tags are not necessary for every post.
WordPress user role determines access permission to the users of a WordPress site. oAdministrator: They have full rights over a site. oEditor: They deal with the content section of a website. oAuthor: They only deal with their posts. They can delete their post even after publishing. oContributor: A contributor doesn't have the right to publish their post or page. They need to send it to the administrator for review. oSubscriber: Users who are subscribed to your site can log in and update their profile. oFollower: They don't have any right. They can only read and comment on your post. oViewer: They can only read and comment on a post. More details...


Follow the path for form events
C:\Users\pione\OneDrive\Desktop\FED\JAVASCRIPT\13. Javascript Form Event
Promises are used to handle asynchronous operations in JavaScript. Before promises, callbacks were used to handle asynchronous operations. But due to the limited functionality of callbacks, using multiple callbacks to handle asynchronous code can lead to unmanageable code or call back hell. So, Promise was introduced in ES6 ( ECMAScript 2015). Promise object has four states -
- Pending - Initial state of promise. This state represents that the promise has neither been fulfilled nor been rejected, it is in the pending state.
- Fulfilled - This state represents that the promise has been fulfilled, meaning the async operation is completed.
- Rejected - This state represents that the promise has been rejected for some reason, meaning the async operation has failed.
- Settled - This state represents that the promise has been either rejected or fulfilled.
- A promise is created using the Promise constructor which takes in a callback function with two parameters, resolve and reject respectively.
- resolve is a function that will be called when the async operation has been successfully completed.
- reject is a function that will be called, when the async operation fails or if some error occurs.
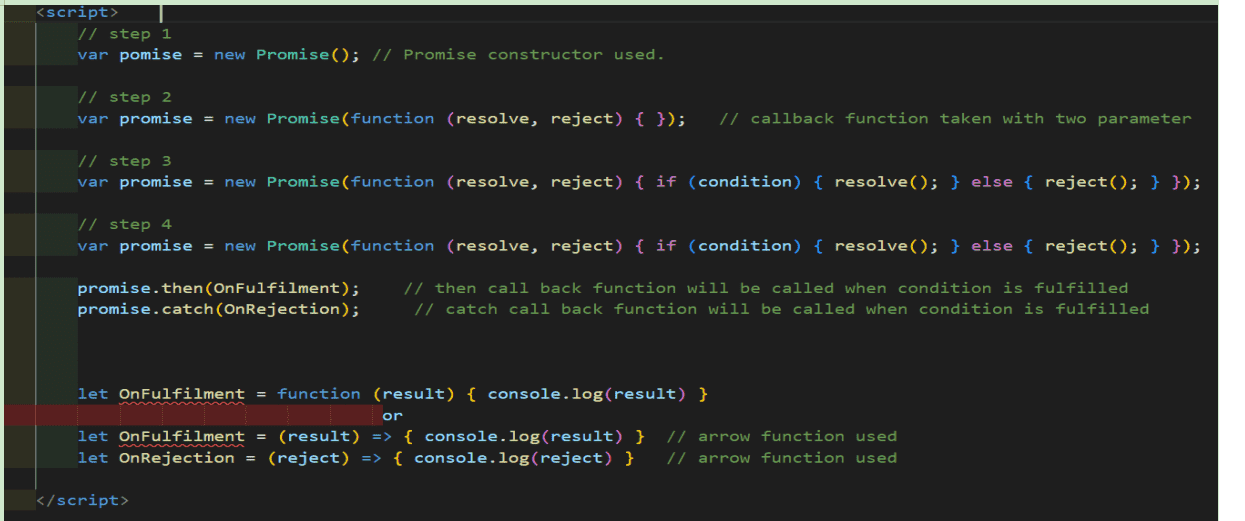
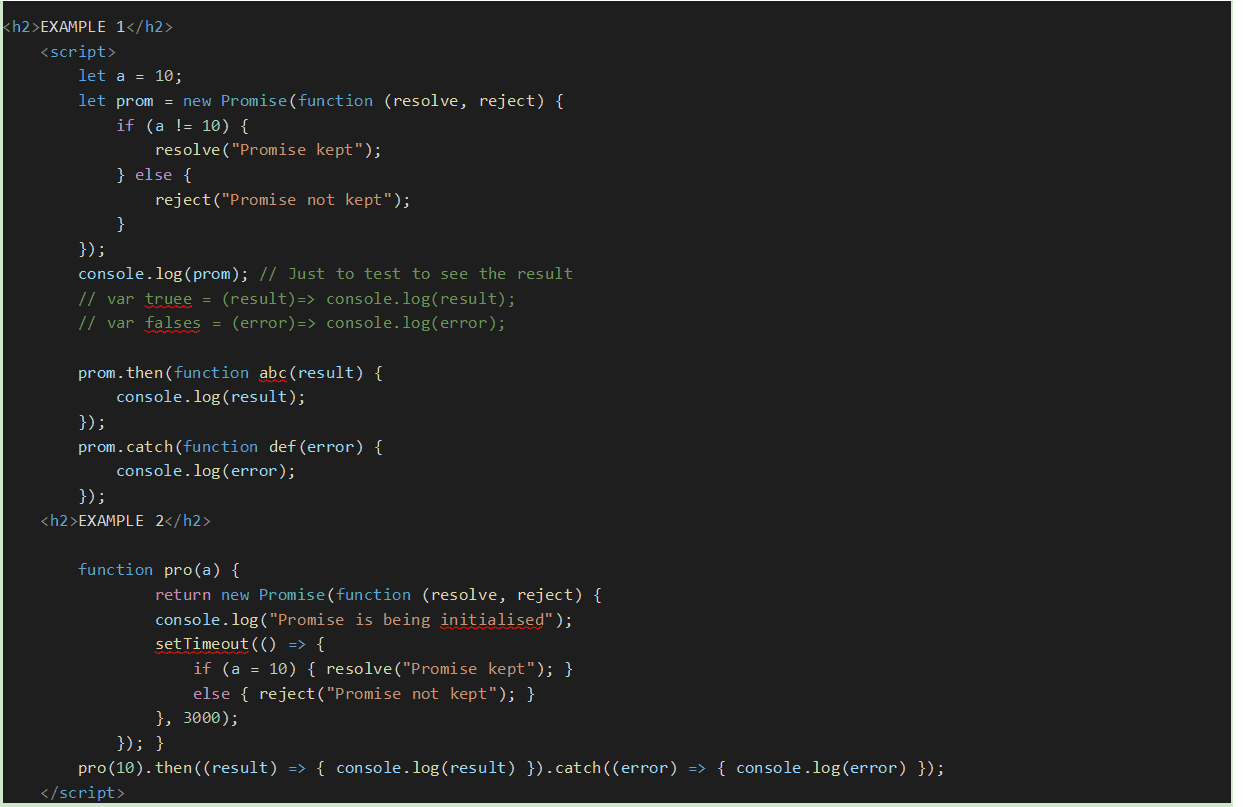
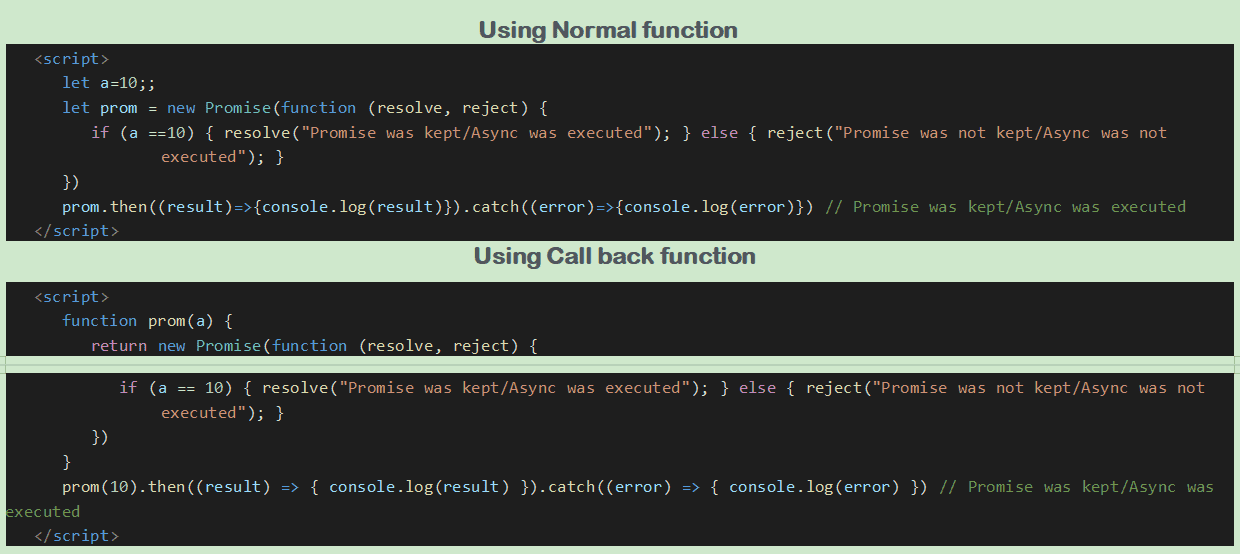
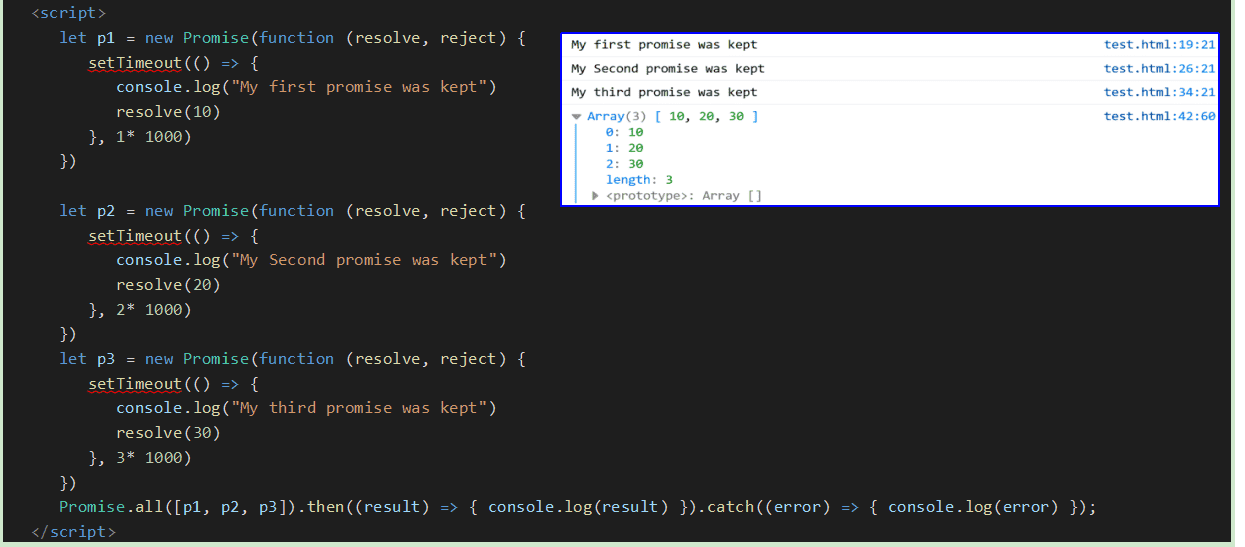
If all the promise is true then then call back function will execute and if any of the promises is false then catch call back will execute.
Syntax
Promise.all([p1, p2, p3]).then((result) => { console.log(result)
}).catch((error) => {
console.log(error)
});
Here, p1, p2, p3 are three promises.
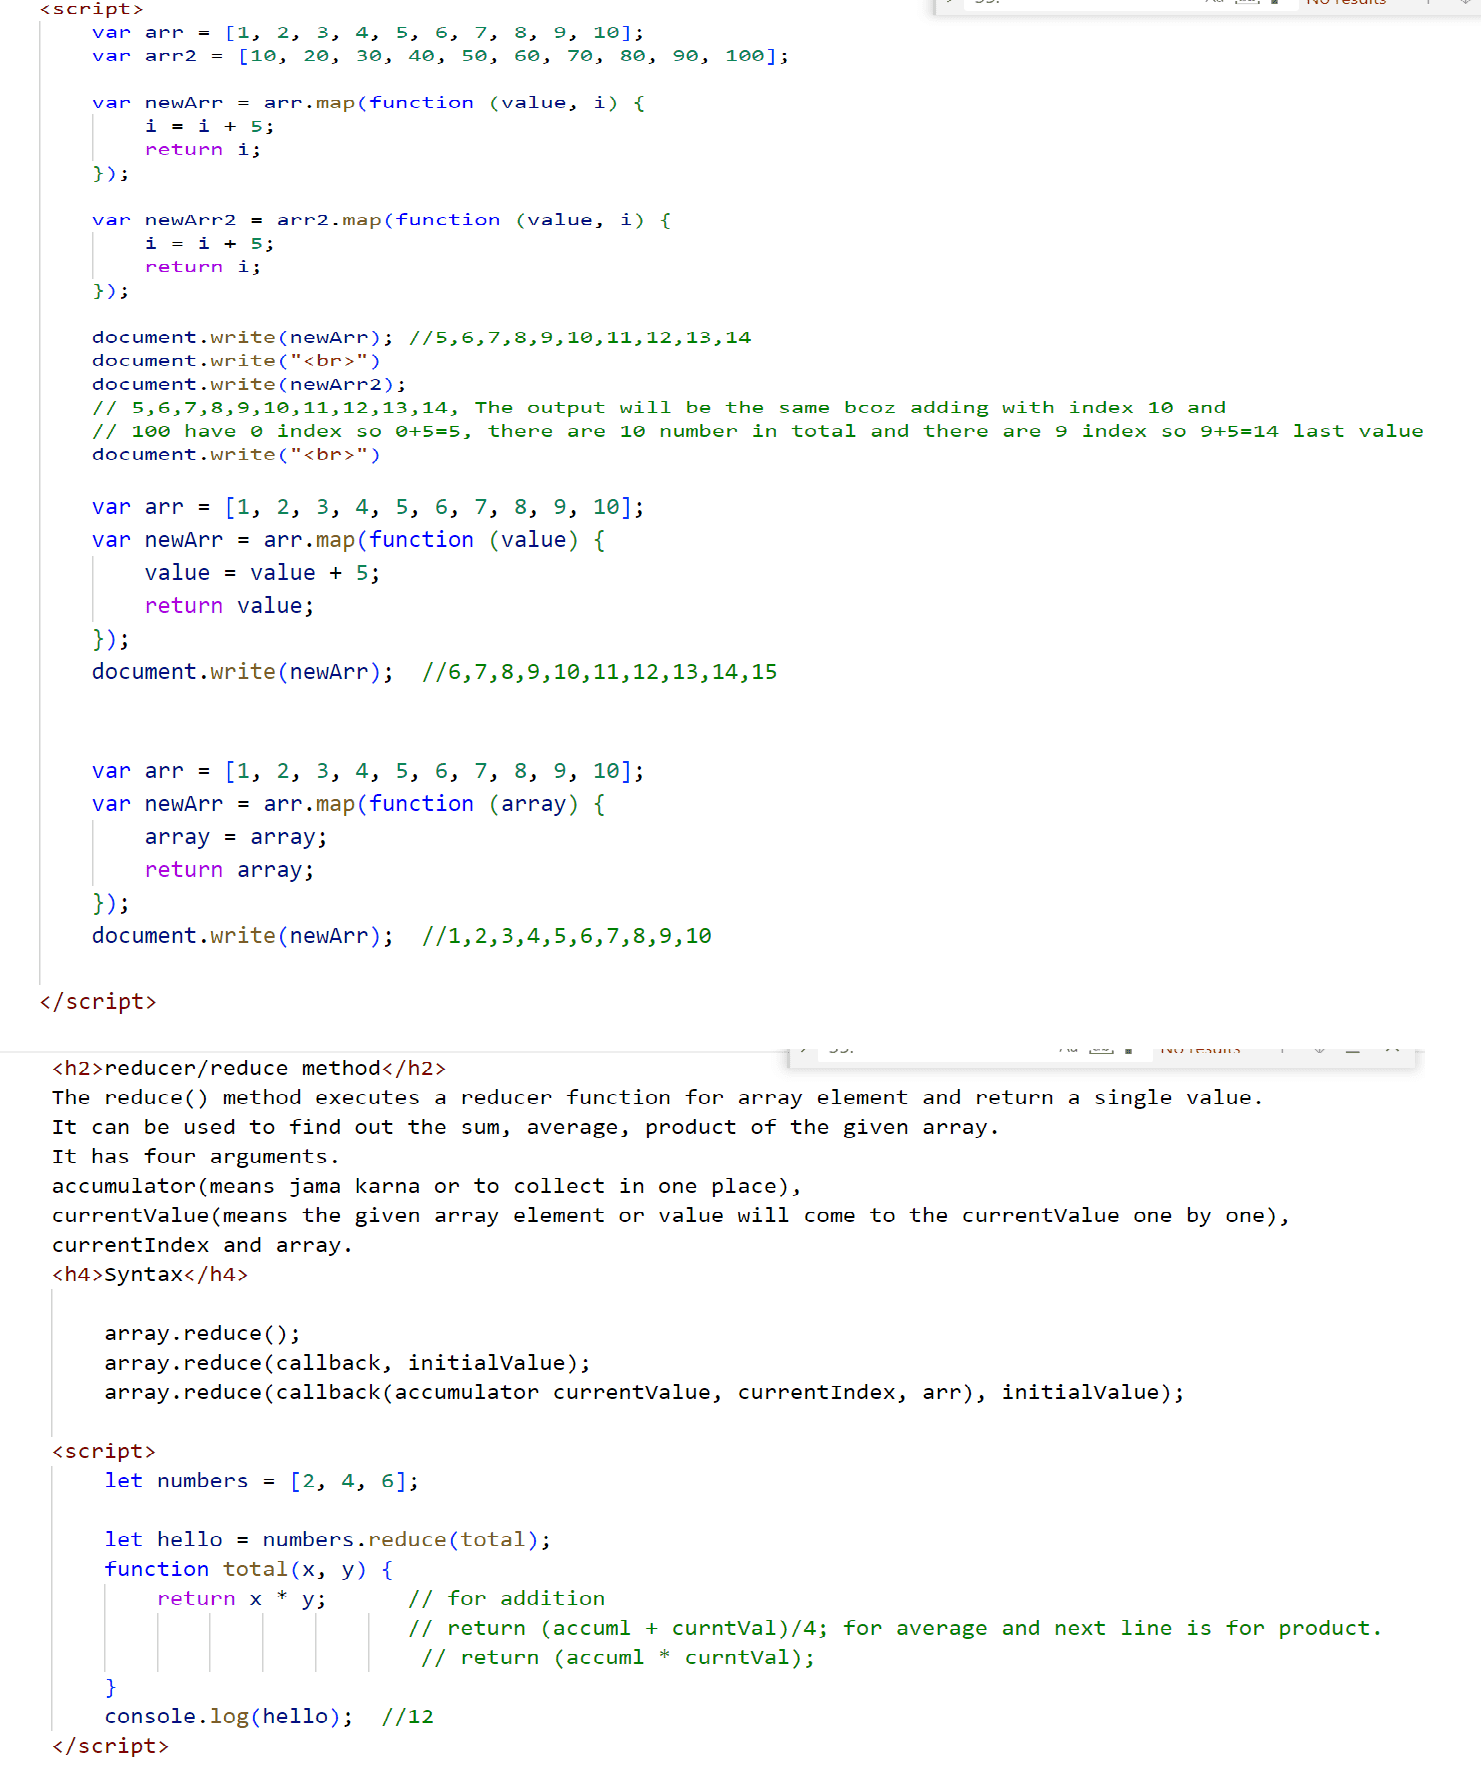
Map method is used to create a new array by adding, multiplying the
values of an array.
It also used to make new array from the multidimentional objects by
taking out the values.
usuallY don't print it.
It has three parameters (value, i,array).
value is for value like
in var a 1,2,3....,10 are values,
i is index and array means
complete array.



Using display property(display: none). It’s not available for screen readers. The element will not exist in the DOM if display: none is used.
Using visibility property(visibility: hidden), will take up the space of the element. It will be available to screen reader users. The element will actually be present in the DOM, but not shown on the screen.
Using position property (position: absolute). Make it available outside the screen.
The keyword initial can be used to reset or restore its default value. We know that every property has its default value like paragraph has default color “black” which will appear on the browser when we don’t reset/give any color to paragraph tag.
Similarly the default font-size of any paragraph is 16px which will apply if we don’t give any font-size. So, if we want to know the default value of any property then we can use initial. For example p{color:initial}, it will set black color in the paragraph because initial return the default value. Similarly, p{color:inherit} will give the color given in parent of paragraph tag if any else return the default one.
More images available in pdfnotes
Refer audio for more clarification
We can do it by adding vscode.dev after https such as https://vscode.dev/github.co
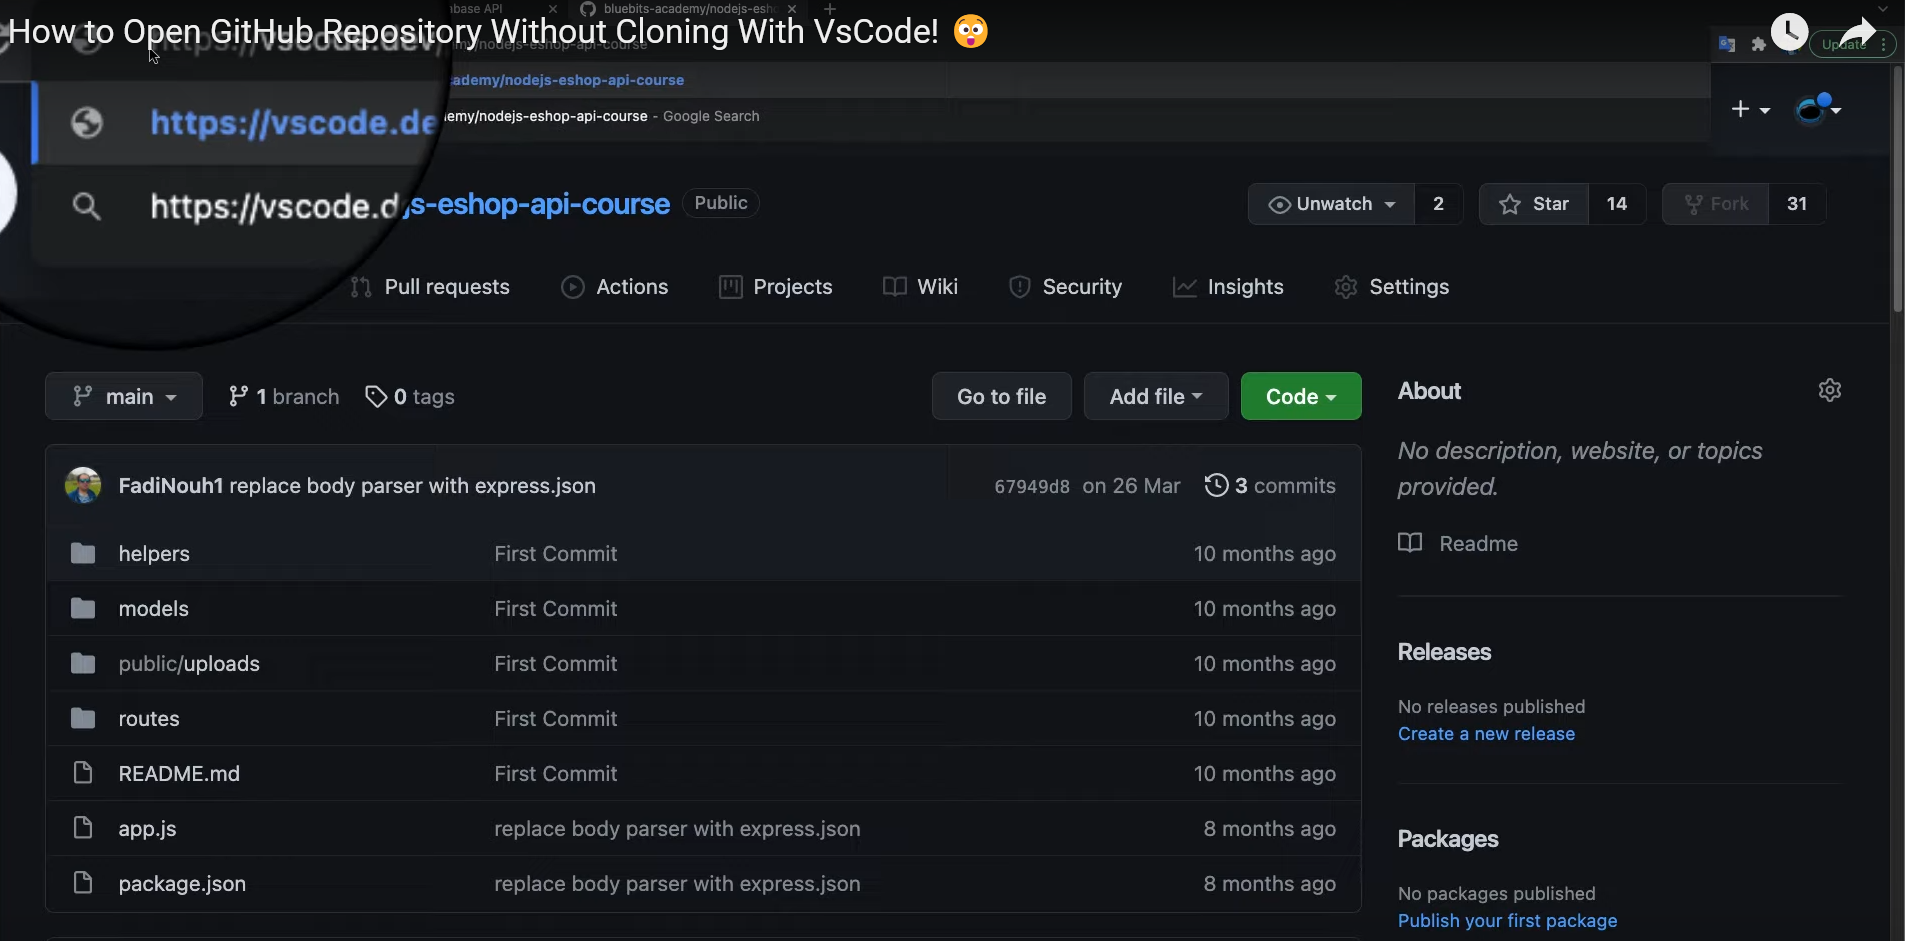
Go go destop version of github and then click on the file(on the left top side) and then go to the option and then sign out and sign in with the currect git hub account and also assure that both the account of github browser version and desktop version are same.
How to upload project online using git hub
How to create repository and put big file online Go to
https://github.com/Srz20/
Then create new repositary. Then upload file then open git hub installed
in windows as it will allow to upload big project then click on Add drop
down and clone repository and then find the repository you have created
or click on URL tab and to go the github.com and copy the path of https
that you will find under code tab and past in the desktop version and
paste the copied url and then clone, it will start cloning. Once it is
cloned, it will open a new page NO LOCAL CHANGES
Click on show on explorer. It will open a new page, like .git file will
be there, paste all the files of your projects here. Once it is done, go
to the desktop version git hub, here you will see green page will
files.filll section before description about your web and then click on
commit to main. Now, click on push origin, it will download like 100%
Now go to the browser git hub and click on your repository, you will see
your all files are downloaded here. Now go the settings
You will see your repository name that you can rename if you want.
Click on pages, you will see GitHub Pages is currently disabled under
BRANCH , change it to main. Wait for a while and go the settings again
and then you will see the link of your website.
